In this map you are required to capture the enemy's flag. You do this by running into their flag and taking it back to your capture point. As with most maps of this type you have a base and the enemy has a base. You must defend your base while attacking the enemy. The defense is probably the most important as once your flag is taken it can be difficult to get it back before it is captured.
Once your flag is taken you should concentrate on killing the flag carrier. He/she will try to run back to their base and capture it. To increase your chances of killing the carrier, you will have to know how it is possible to escape the base. You will also need to know what sort of weapons are best used in the various areas of the map.
|
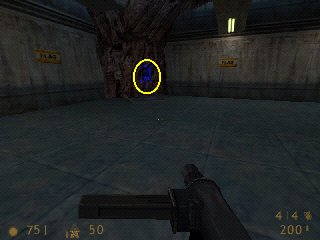
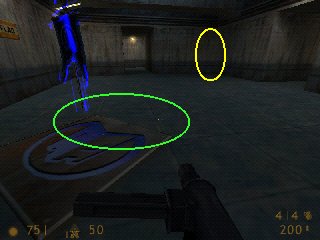
This is your flag. You must defend it with your life. This is quite a literal statment and you will die frequently against a well prepared attacker. However there are things you can do to make things harder for them. And this is where I excel. I have played games where, it was me vs. 2 in this room, but I was prepared and won without losing any health at all. You too can be this effective, without much effort at all. All the skill in the world can't beat a prepared defender. (Provided the defender has some skill him/herself). |
| One of the first things you can do is stop them going
down there by killing them before they enter your base.
This however will not always happen especially if they
use the water tunnels linking the two bases. So if they get into your base this is the most likly way they will take to get your flag and as such a Demoman can place upto 8 pipebombs where the yellow square is. Just push seconadary fire and BOOM! many pieces of bad guy all over your new jacket. Be warned though the enemy won't be tricked by this for long and you will have to change your tactics. |
|
|
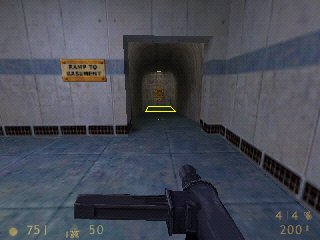
And so you can try this. Hide round the corner where I've marked it and the enemy will run straight past you (usually). Then just shoot them in the back with your most powerful weapon as you don't have much time before they are round the corner to your flag. To help if your a Demoman you can place pipebombs down the corridor where the enemy has to run over them. For effective coverage you can place down 8 pipebombs, any more and the first one will explode. |
| Once their in the corridor they have to travel down one of two tight alleys. You can use this to your advantage. Stand so you can see down both alleys and wait for the enemy to come out. Time it right and a grenade will see him killed without firing a shot. Remember that should you get hurt there is a supply point nearby so you can heal and restock with ammo. In fact it is so close that if your in the supply point and here that your flag has been taken you will have enough time to get out and take them on. | 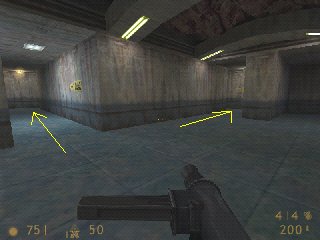
|
|
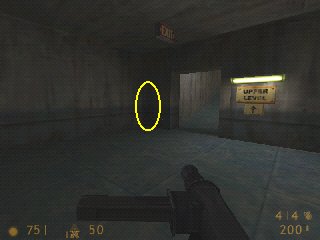
This is a beauty of a defense. If you stand where I have put the yellow circle and place pipebombs where the green circle is then the enemy shouldn't stand a chance. They may try to kill you if they know your there, but the great thing about the pipebombs is that you can hide in the nearby supply depot and simply detonate the bombs when you here the flag is taken, however you have to be quick and this may not kill them, so run out and shoot them down. And always remember that even if you do kill them with the explosion there may be two of them and this would require assistance from your collegues. |
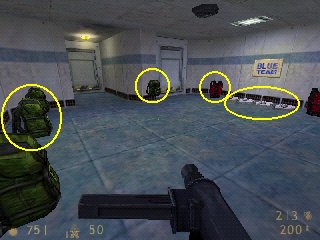
| This is one of your supply rooms. Many people don't
actually use them as often as they should, which gets
them killed, cos they run out of armor and health, or
even worse ammo. From the left the circles mark out the
following. 1. This is a typical ammo pack, two of these is enough to make sure you have full ammo in all your weapons. 2. This is a Mega ammo pack only this one can restock your grenades, it also restocks all other ammo. 3. This is armor two is enough to put any class on full 4. And finally health, as with HLDM it only gives you a little with each one and you may need to wait for them to respawn |
|

|
This is the ways into your base. The first one is the main entrance, people just walk into here. The second is the water entrance. There are under water tunnels which come up in both bases, going up one of these is very hazardous, as a grenade will bounce all the way down and only stop when it hits the bottom or you! It's best to only use this if your a spy or scout and can get out of there quickly. An engineer should build a turret just here to cover both entrances, or just to the side of where I am standing. That way almost no one can get in without first destroying the turret. Do be warned though, a good and experienced player can do a "rocket jump" up to your capture point and miss this part of the building completely. |
| Where I have placed the yellow ring is the capture point, it is where you must bring the enemy flag in order to score a capture. Unfortunately, as you can see, it is outside and almost anyone can kill you running to it, so setting up a defensive/offensive up here will help you score more easily and with less deaths. For the team being killed up here is not a problem because there will always be a nearby team member to pick it up and capture it, however you don't personally get the extra points and so for personal glory and less deaths, it's best to get a good team up here. Also it makes it more difficult for the enemy to put up an offense if they are killed before reaching your base. | 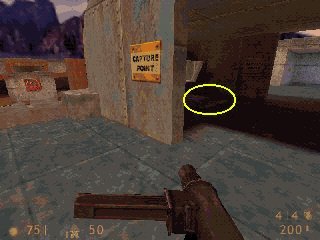
|